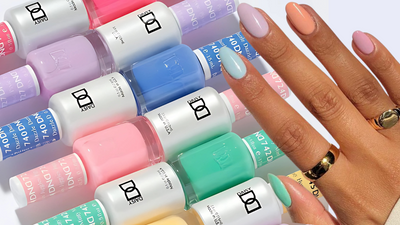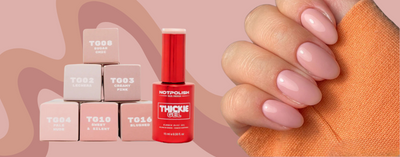
Say goodbye to trekking all the way across town just to get your nails done. Say adios to the terrible smell of nail lacquer. Say hasta la vista to smudges, chipping, and fingerprints in your fresh manicure. Say hello to salon-quality dip powder manicures from the comfort of your own kitchen table.
Dip powder manicures are rising in popularity for all the reasons we listed above (convenience, beauty, and ease of application, anyone?) and more. Dip powder is odor-free, does not require a UV/LED lamp to set, and the process takes about half the time of acrylic manicures. And, because these manis don’t require glue or the extra weight of acrylic nails, dip powder manicures won’t damage your nail beds.
But what are dip powder nails, exactly?
Defining Dip Powder
Dip powder nails, also known as SNS nails, are a manicure style that involves painting the nail with a base coat, dipping the nail into a colored powder, activating the powder with an activator, and sealing the nail with a clear topcoat. Dip powder nails last so much longer than traditional nail polish and even gel manicures. In fact, dip powder manicures can last up to one month or longer! This means a chip-free, beautiful manicure for weeks upon weeks. Because of their worry-free result, powder manicures are ideal for special events like weddings, baby showers, and a little bit of luxury for new moms before the birth of a baby.
Not sure where to start? We’re a big fan of Kiara Sky dip powder kits. Once you find your favorite, we’ll teach you how to do your very own dip powder mani. Just follow our tips below on how to easily apply dip powder nails at home.
Step One: Prepare Your Nails
Though it’s tempting, you don’t want to slather on your base coat without preparing your nails first. Take the time to pamper your hands and your nails, just like you would in a salon. Start by washing your hands. Then, push back your cuticles—this will get rid of any dead tissue building up on your nail.
Once your cuticles are pushed back, buffer the shine out of your nails and shape the tips. This smooth, unpolished surface will help the base coat bond better.
Step Two: Apply Your Base Coat
Now that your nails are adequately prepped, you’ll want to apply a thin layer of base coat to the entire surface of your nail. Start at the bottom and end at the tip of the nail. Be careful not to get any of the base coat on your cuticles, as the powder will stick anywhere the base coat is applied.
Pro Tip: Apply your base coat and immediately dip your nails one at a time.
Step Three: Dip Your Nails
After you paint your first nail, immediately dip it into your dip powder. Ensure that your entire nail is coated with color. Gently tap your finger afterward to get rid of any excess powder. If you aren’t comfortable with dipping your nail, you can also brush the powder onto your nail as an alternative.
Feel free to repeat steps two and three a second time for even more coverage. After you apply powder, wait for it to set, then apply another layer of base coat. Then, dip your finger into the powder or brush the powder on your nail a second time.
Step Four: Activate
Once your nails are adequately covered with dip powder, it’s time to activate them. Apply a coat of activator on each nail and watch as the color darkens and appears denser. Wait for the activator to dry completely.
Step Five: Add Your Topcoat
Now that your nails have been activated, seal them with a glossy topcoat. After 15 seconds have passed, apply a second layer of topcoat. You’ll lock in the color and add a glorious shine that will last for weeks!
Step Six: Pamper Your Nails
Once the topcoat is completely dry, pamper your nails by applying cuticle oil. Never heard of this? It exists, and it’s a wonderful treat for your nails. Cuticle oil gently moisturizes your nails for a shiny, healthy appearance.
What Makes Dip Powder So Great?
Now that you know how to easily apply dip powder nails at home, your interest may be sparked. But, like many of us, you may want to know a little bit more about dip powders and their benefits. We don’t blame you! To convince you a bit more, here is a list of our favorite benefits of dip powders.
No UV Lights
Dip powder manicures don’t require the harsh UV lights that gel or acrylic manicures require. You don’t have to worry about exposure to harmful UV rays, and you’ll enjoy a faster drying time.
Long-Lasting
When applied properly, dip powder manicures will look fantastic for a long period of time. In most cases, dip powder nails stay chip-free for anywhere between two weeks to a month—or longer.
So Many Choices
With so many colors available, you won’t have any issues replacing your favorite gel or polish color with a dip powder. Since dip powders have exploded in popularity, companies are working tirelessly to produce a huge selection of color choices. You’ll find gentle pastels perfect for charming garden brunches, vibrant jewel tones for holiday parties or seasonal celebrations, and pretty neutrals ideal for weddings. Since the colors last so long without smudging or chipping, you won’t have to worry about flawed nails on your big day.
Easy Removal
If for whatever reason, you need to remove your dip powder manicure, doing so is easy. You won’t have to struggle to peel off, file down, and provide intensive care to your nails like you would post-acrylic manicure. You won’t have to worry about staining your nailbeds, either, like you occasionally do with gel or traditional nail polish.
Flexibility
Dip powder nails aren’t rigid, unlike acrylic manicures. They are very similar to gels in this aspect, which contributes to a chip-free color and shine.


1 comment
You didn’t tell us how to remove our nail. Just that it’s so easy