Who doesn’t want a long-lasting manicure? Achieve great results with dip nails. This nail look option is simple and effective. All you have to do is gather the right tools and follow some important steps. Let us help you. Check out the ultimate guide to applying perfect dip nails for more information!
Why Choose a Dip Manicure?
The only manicure that’s more durable and long-lasting than a gel set is dip manicures. They’re simple and stylish, making them great for at-home manicures! Furthermore, they don’t require UV light to cure. Dip powder nails last up to a month and remain chip-free.
Dip nails are also fun to apply. In contrast to other nail looks, dipping your fingers in a colored powder is more interesting than brushing on polish. If you’re interested in a fun and easy-to-apply manicure, dip nails are the best choice.
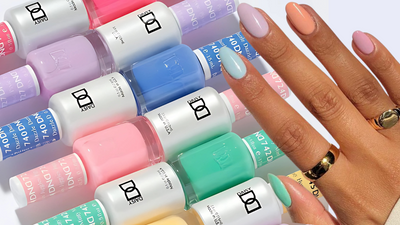
The best part is that dip powders have various color options. For instance, OPI dip powders come in gorgeous shades like Pink Flamenco, Chick Flick Cherry, and Brown To Earth. Never worry about a dull or lackluster manicure when there are awesome powder options.
Dip Powder Protocol
As previously mentioned, dip powder nails require dipping your fingers in a colored powder. This leads to germs transference, as the bacteria on your hands will enter the dip powder, thus contaminating the powder. You risk a bacterial infection the next time you use the product. It’s important to acknowledge this hygiene concern and minimize risks.
The best way to reduce the spread of germs is to utilize the “pour-over” method or separate the powder into a smaller container. Here’s how both techniques work:
- Pour-over method: Pour the dip powder on top of your nails instead of placing your fingers inside the powder jar. Be sure to place a bowl or napkin below your fingers to catch the fallen product.
- Separate powder: Pour some of the dip powder into a separate container and dip your finger in the container rather than the initial dip powder jar. Be sure to discard the powder after application (to avoid contamination).
How To Apply Dip Nails
Dip nails are simple to apply, and they look amazing. When you have the right tools, this manicure only takes 30 to 45 minutes. Gather your materials and follow these steps for the best dip manicure.
Tools You Need
- Prep tools: buffer, nail file, clipper, cuticle pusher
- Small brush
- Dip powder
- Base coat/bonder polish
- Activator polish
- Topcoat polish
Steps
Step 1: Prep Your Nails
Wash your hands with soap and water to get rid of bacteria. Use a nail clipper and file to shape your nails. Use the cuticle pusher to push back your cuticles. Then, use the buffer to create a rough surface on your nails. For dip manicures, a rough nail plate allows the base coat and dip powder to adhere better. Remember, the better the buff, the longer your manicure will last.
Step 2: Apply Base Coat/Bonder Polish
For dip powder nails, the base coat is also a bonder. The bonder polish helps the powder stick to your nail plate. After prep, brush on a layer of the polish. Be sure to apply the base coat 3 millimeters away from your cuticle. When a bonder is too close to the skin, the powder will stick to cuticles (making the manicure look messy).
Pro Tip: Apply base coat one finger at a time because you must immediately dip the finger inside the powder after application. Doing so prevents the polish from drying out before you use the dip powder.
Step 3: Dip Your Nails
Here’s the fun part—dipping your nails in the powder! At a 45-degree angle, dip your finger in the colored dip powder. With a small brush, get rid of the excess powder on the side of your finger. If you utilize the pour-over method, pour the powder directly on your finger and tap away the excess product.
Step 4: Apply Activator Polish
After dipping your nails in the powder, grab the activator. Apply a layer of activator polish to harden the base coat and powder blend. Let the polish dry for 2 minutes. After the polish hardens, you can use a nail file to further shape your nails. However, this is not a requirement.
Step 5: Seal Manicure With Topcoat
Complete your manicure with a topcoat. Apply topcoat in quick, thin strokes. Allow the polish to dry for 3 minutes. Voilà! You have a complete manicure. Dip nails will last up to a month. For proper maintenance, periodically apply a layer of topcoat to further seal the manicure.
Removal Process
Learning how to apply dip powder is important, and understanding the removal process is essential too! When it’s time to get rid of your dip nails, follow our procedures. First, gather these tools:
- Pure acetone
- Nail file
- Metal cuticle pusher
- Nail buffer
- Bowl
- Vaseline (petroleum jelly)
After gathering your tools, it’s time to remove the dip manicure by following these steps:
Step 1: Use the nail file and buffer to get rid of the topcoat and activator polish. The thinner the layers, the less time you need to soak off the powder.
Step 2: Pour the acetone into the bowl. Before submerging your fingers in the liquid, rub Vaseline into your fingertips and cuticles. This prevents your skin from drying out while soaking in the acetone bowl.
Step 3: Soak your fingertips in the bowl for 10 to 20 minutes. This allows the powder to loosen and flake off.
Step 4: Remove your fingers from the bowl and use the metal cuticle pusher to scrape off the loosened polish. If the polish doesn’t flake away, place your fingers back inside the bowl for 5 to 7 minutes.
Step 5: Get rid of the remaining polish with the nail buffer. Buffing also evens out the texture of your nails!
Aftercare
After removing the dip manicure, wash your hands with soap and warm water. Moisturize your skin with hand cream and massage cuticles with cuticle oil. It’s essential to let your natural nails rest between manicures. Therefore, wait a month before pursuing another manicure. During this time, continue to use hand creams and apply cuticle oil three times a day. Healthy and happy hands improve nail health and enable growth.
After reading the ultimate guide to applying perfect dip nails, you can complete this manicure like a pro! If you’re interested in purchasing the right materials, consider Nail Company Wholesale Supply as your supplier. From dip nails to acrylic sets, we have all the tools you need. Browse our website today!


